There’s nothing more frustrating than a dull knife. Cooking becomes a chore, and even simple tasks like slicing bread feel like an uphill battle. But don’t despair! Sharpening your own knives is a surprisingly simple and satisfying DIY skill. This guide will walk you through the basics of bringing your blades back to life, making your kitchen a happier, more efficient place.
Why Sharpen Your Knives?
Beyond the obvious safety benefits (a sharp knife is actually safer than a dull one, as it’s less likely to slip), maintaining a keen edge prolongs the life of your knives, improves their performance, and makes food preparation a joy. You’ll achieve cleaner cuts, reduce effort, and prevent damage to your ingredients.
Getting Started: Essential Tools
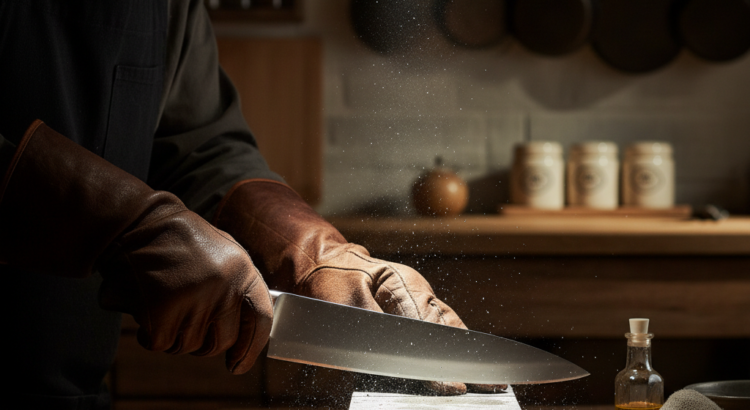
For beginners, a simple sharpening stone (also known as a whetstone) is your best friend. Look for a dual-grit stone with a coarse side (around 400-600 grit) for bringing back a very dull edge and a fine side (around 1000-2000 grit) for refining and polishing. You’ll also need a small container of water (for soaking the stone) and a few old towels or rags to clean up and protect your workspace. Safety first: Consider using cut-resistant gloves, especially if you’re new to sharpening.
Step-by-Step Sharpening for Success
1. **Prepare Your Stone:** Submerge your sharpening stone in water for 5-10 minutes until no more bubbles appear. This keeps the stone lubricated and prevents metal particles from clogging its pores. Place the wet stone on a non-slip surface with the coarse grit facing up.
2. **Find Your Angle:** This is the most crucial step! For most kitchen knives, an angle between 15-20 degrees is ideal. Imagine you’re trying to slice a thin sliver of the stone. A common trick is to use coins stacked on the spine of the knife as a guide, or a sharpening guide clip. Start with the heel of the blade against the stone.
3. **Sharpening Strokes (Coarse Side):** Maintain your chosen angle and push the blade across the stone, leading with the edge. Use an arc-like motion, moving the entire blade from heel to tip over the stone. Apply moderate, consistent pressure. Repeat 10-15 times on one side, then flip the knife and repeat on the other side. You’re aiming to create a slight “burr” – a tiny wire edge – on the opposite side of the blade. You can feel this burr by gently running your fingertip *away* from the edge (never into it!).
4. **Sharpening Strokes (Fine Side):** Once you’ve established a burr on both sides using the coarse grit, flip the stone to the fine grit side. Repeat the same sharpening strokes, but with lighter pressure. The goal here is to remove the burr and refine the edge. Do 5-10 strokes per side, then alternate sides, reducing pressure with each pass. Finish with very light, alternating strokes until the burr is gone and the edge feels smooth and sharp.
Common Mistakes to Avoid
Don’t apply excessive pressure, as this can damage the blade or create an uneven edge. Consistency in your sharpening angle is key – even slight variations will result in a less effective edge. Also, remember to clean your stone after each use by rinsing it under running water to remove metal particles, ensuring it’s ready for its next job.